Once UpRaise for Employee Success is successfully installed on your Jira instance, Jira administrations will see a 'Get Started' menu at the top. This menu is available to all the Jira administrators until the onboarding is complete. Idea is, any Jira admin - irrespective of whether they have installed UpRaise for Employee Success or not, can log in & just complete the setup. Main UpRaise menu will be available only after the initial setup is complete.
Clicking on 'Get Started' takes you to the first step of the multi-step wizard
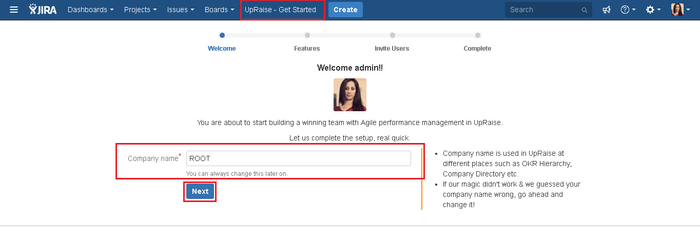
1st step
- UpRaise automatically populates the company name from your license. You can update the name here or later, once the setup is complete.
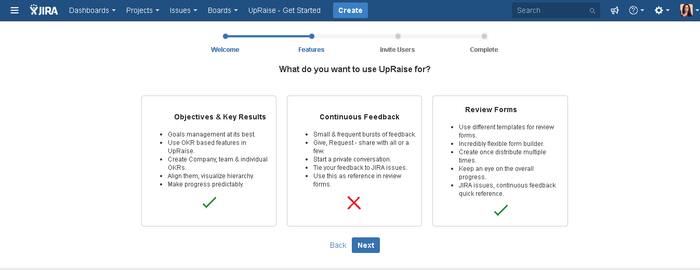
2nd step
- Click Next and you have the opportunity to select which features you'd want to use. By clicking on the respective boxes, you will enable/disable corresponding menu items & sections. Of course, this selection can be modified later on as well.
3rd step
- Setup user access by turning limited roll out on or off.
- Here you can add UpRaise administrators & standard users, who should initially have access. Of course you can just make yourself admin & continue. After the setup is completed, you can always navigate to company directory to set up users.
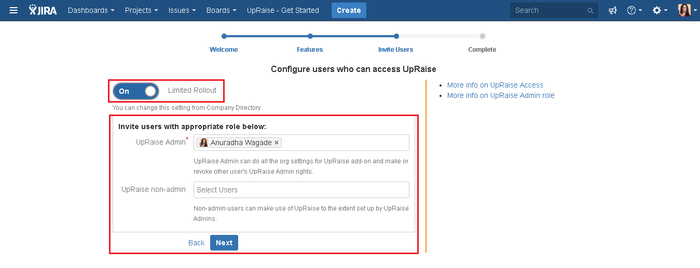
- During onboarding, UpRaise access is set at the user level. It can be changed any time once the set up is complete, via company directory page.
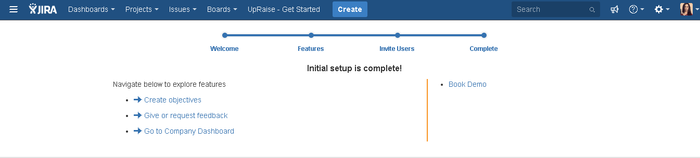
- Once Next is clicked, the set up is complete & you will get a quick set of links to get started.
On this page
| Table of Contents |
|---|
In this section
| Child pages (Children Display) | ||
|---|---|---|
|