Release pages & Widgets are special type of release notes. Given that they work a bit differently, here we are creating step by step guides for getting started. Once you understand how they work, you can do your own customisations on top of what is explained below.
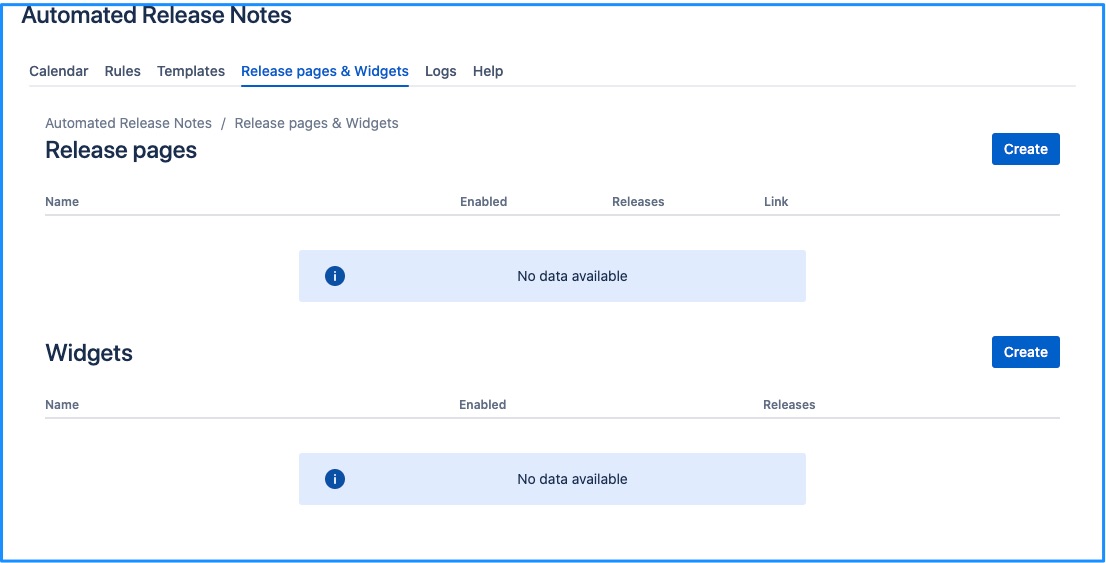
Here’s what the page looks like when there are no release pages or widgets created yet.
Release page - Step by step guide
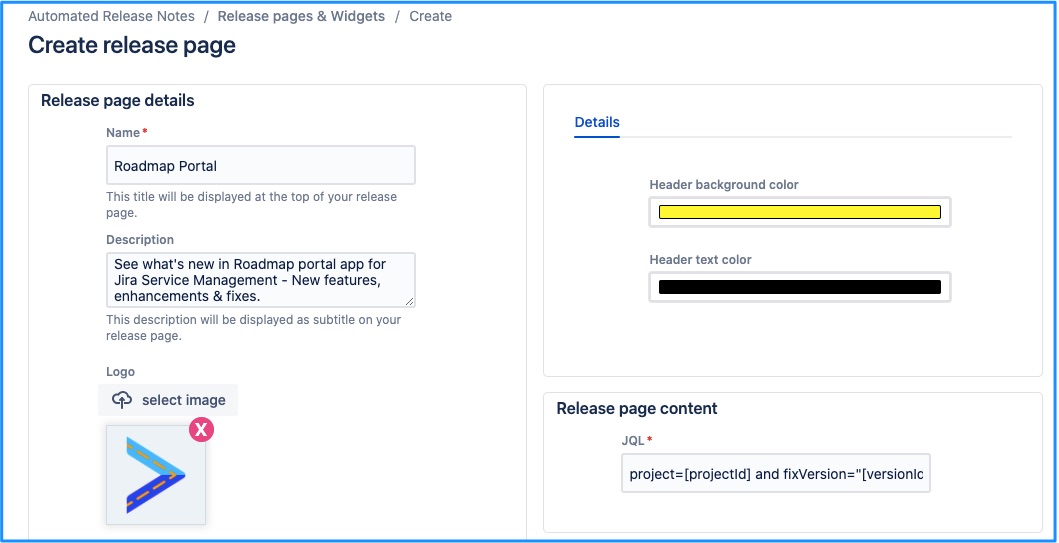
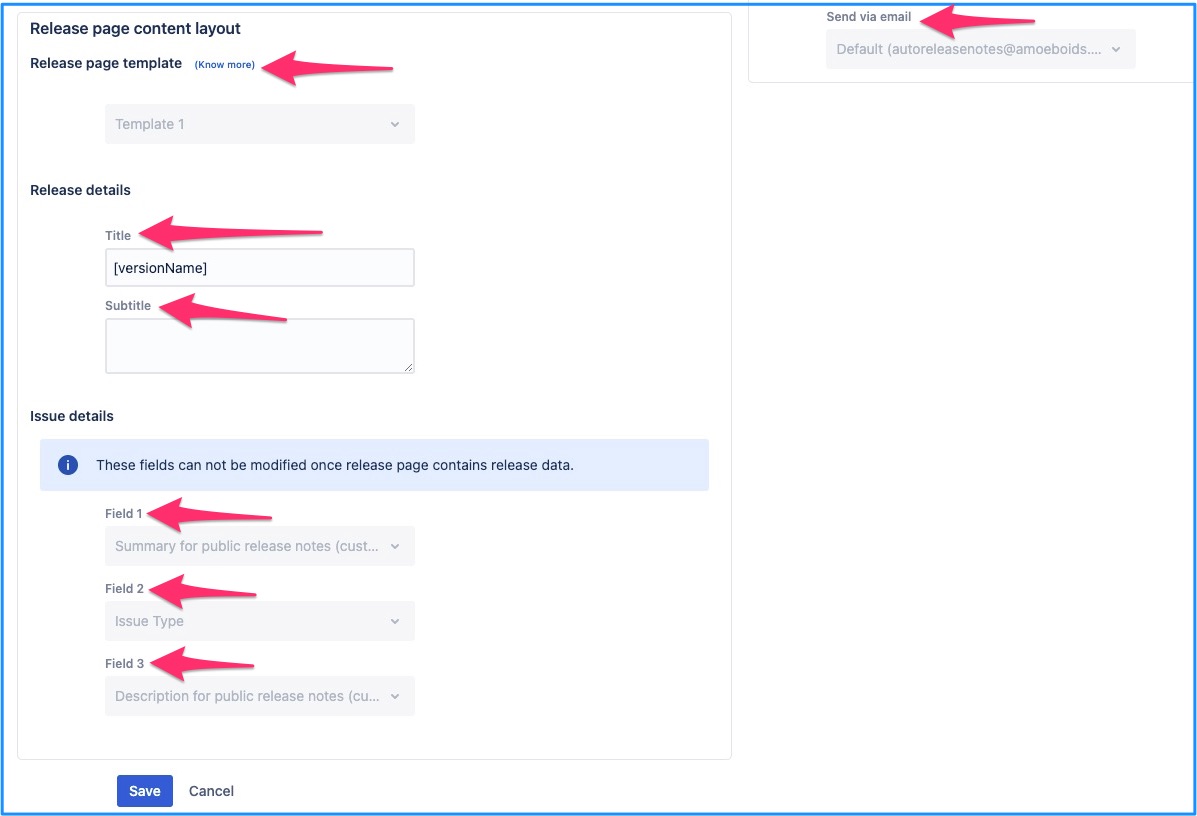
Step 1 - Click on ‘Create’ & you’ll be brought to the following screen. Pay close attention to the information provided.
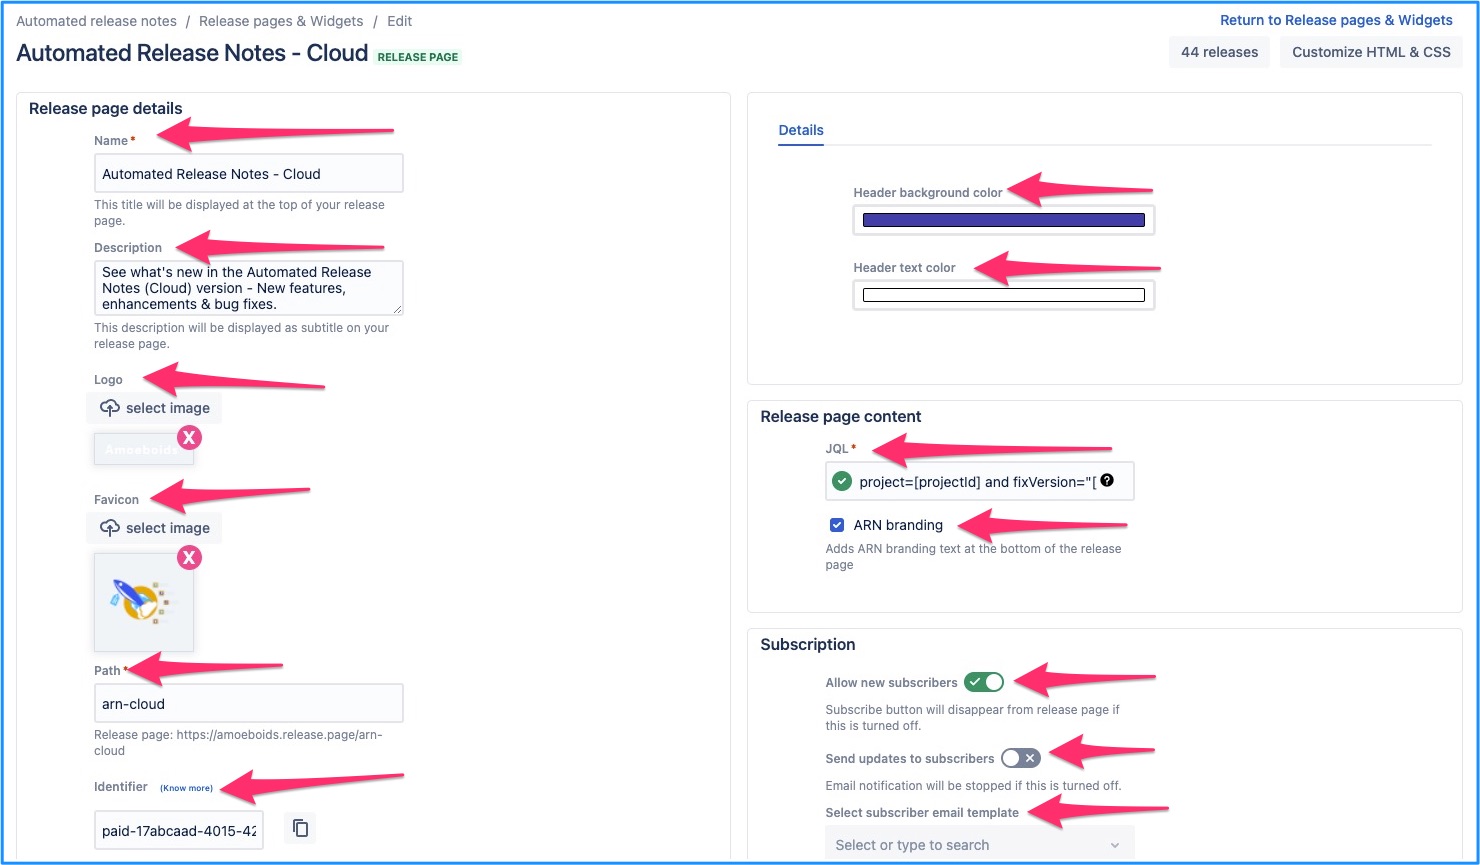
Name - This is the title of release page that appears to the end user.
Description - This is the subtitle that appears on the release page. (you can keep this one empty, if you’d like)
Logo - Upload logo file (use an image with transparent background & square dimensions)
Choose background & text colors for the header.
Release page content - This is the JQL similar to what you use within ARN templates' JQL section. Just use the default one for now.
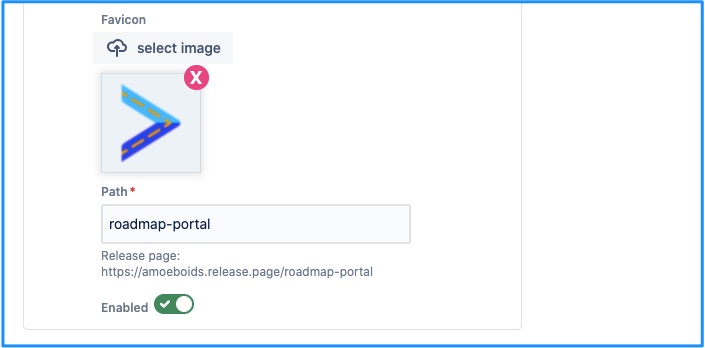
Provide further details
Upload favicon of 48x48 size (note that only .ico files are allowed, you can use any online converters for this)
Path - This is the path of your release page. Complete URL will be visible immediately below the path textbox.
Enabled - Keep it on.
Identifier - This is available only after the release page configurations are saved. Ignore for now.
Choose background & text colors for the header.
Release page content - This is the JQL similar to what you use within ARN templates' JQL section.
Just use the default one for now.
Allow new subscribers - Turning this on means that the Subscribe button is available on the release page
Send updates to the subscribers - If this flag is turned on, you have to choose a release page notification template (configured under the Templates tab) under the next dropdown i.e. Select subscriber email template
Select subscriber email template - Whenever a new release is posted on the given release page, it will trigger this email notification to all the subscribers
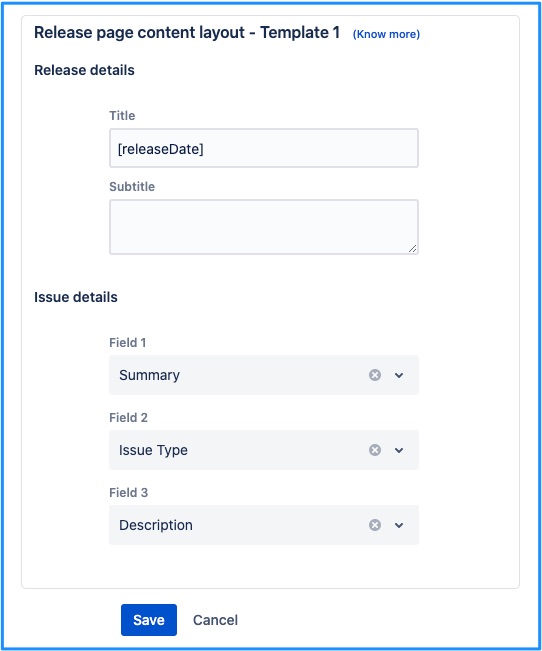
Final set of fields (right now only single template is two templates are available, later on you’d be able to change the template)
Title - You can use one or more variables here. Full list of variables is here - Customising template templates with visual builder. This field can be kept empty.
Subtitle - You can use one or more variables here. Full list of variables is here - Customising template templates with visual builder. This field can be kept empty.
Field 1 - For the sake of easiness, choose summary.
Field 2 - Choose issue type from the dropdown.
Field 3 - Pick up description from the selector.
Step 2 - Now that all mandatory configurations are filled out, click on save.
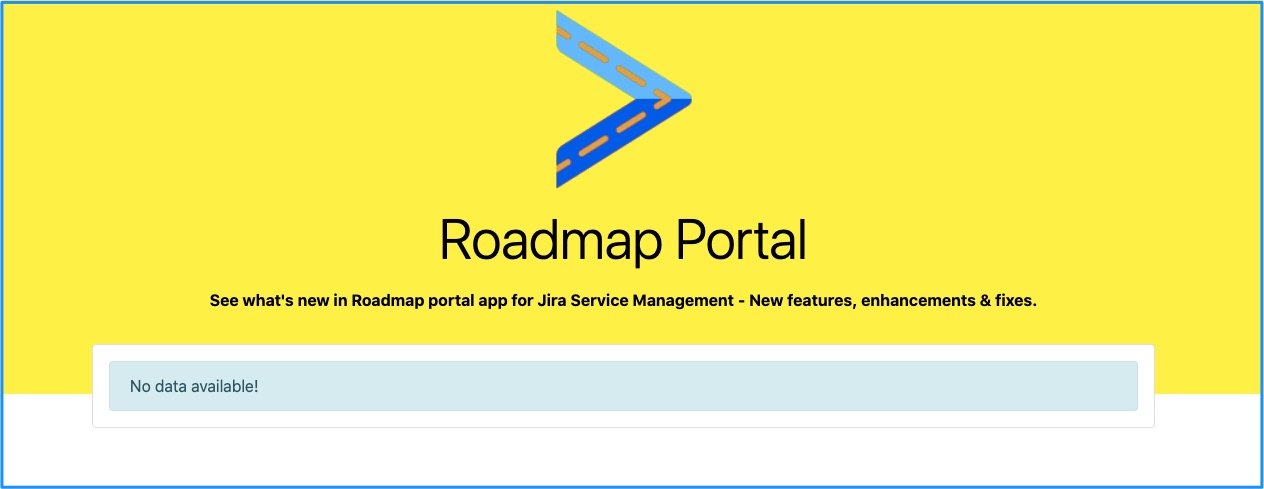
Step 3 - To ensure everything is set up correctly, copy the page url & open it in a browser tab. Since the release page doesn’t have any data releases yet, this is how it will look like.
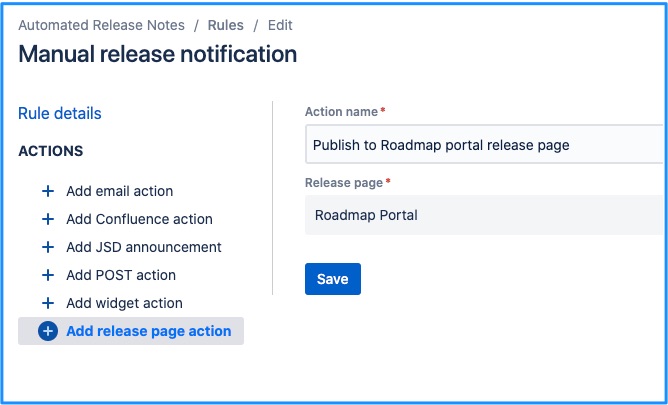
Step 4 - Half the battle is won. Now you must set up a rule to populate information on this release page. Head over to the Rules tab & click on Create. Provide appropriate name for the rule & choose ‘Manual’ trigger.
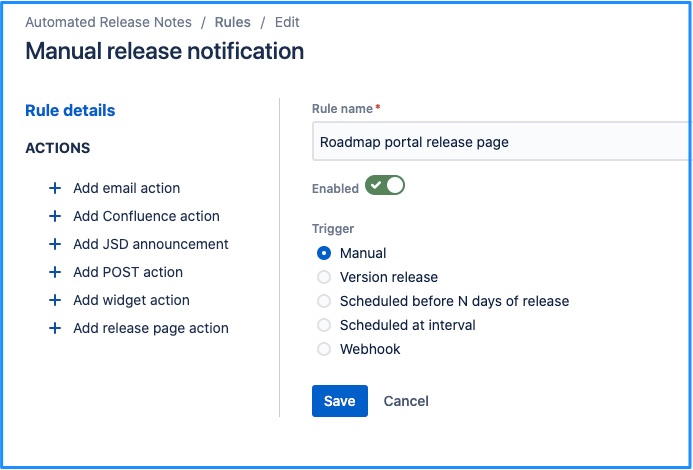
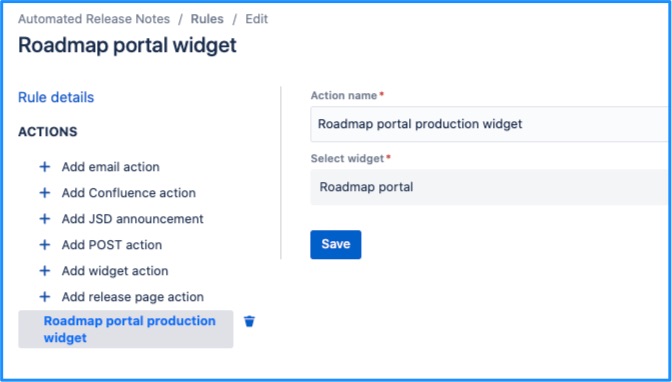
Step 6 - Click on ‘Add release page action’ & choose the relevant release page.
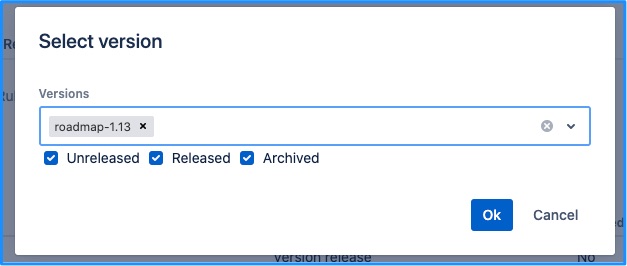
Step 7 - Now run the rule manually by providing it a version. This is how it will look like.
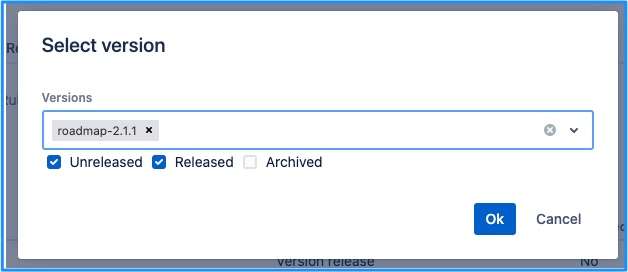
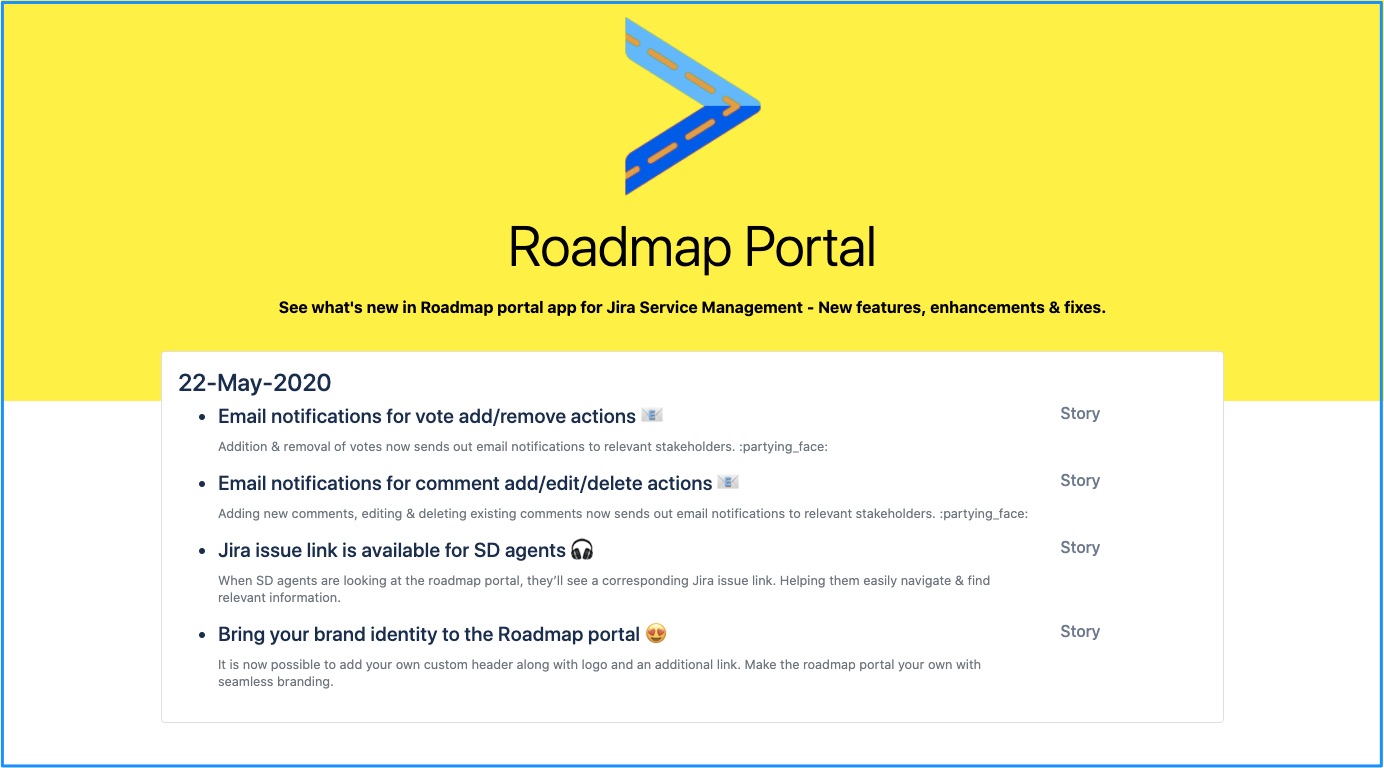
Step 8 - Click on Ok & wait for about 30 seconds for the rule to be executed. (Assuming selected version has issues associated with it) the release page will now display the data. It will look like this. (For troubleshooting, look at the logs tab & see if you see any failure messages)
Widget - Step by step guide
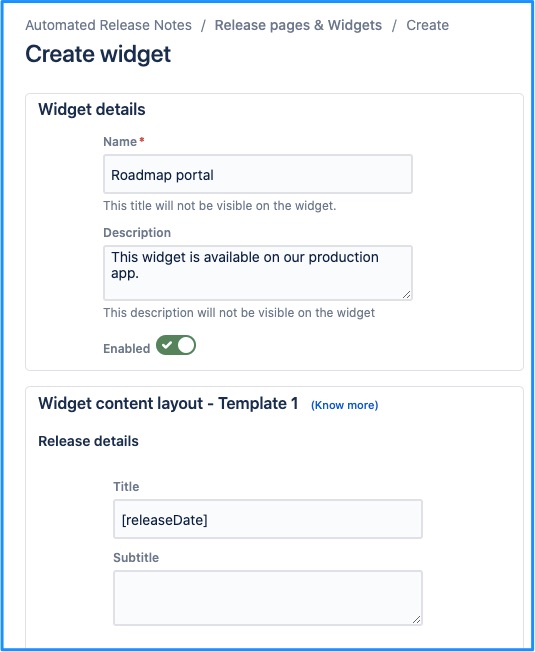
Step 1 - Click on ‘Create’ & you’ll be brought to the following screen. Pay close attention to the information provided.
Name - This is the widget name but unlike release page, it is not visible to the end users.
Description - Same as the name, not visible to the end users. And you can keep it empty too.
Enabled - Keep it on.
Title - You can use one or more variables here. Full list of variables is here - Customising template templates with visual builder. This field can be kept empty.
Subtitle - You can use one or more variables here. Full list of variables is here - Customising template templates with visual builder. This field can be kept empty.
Step 2 - Final set of fields (right now only single template is available, later on you’d be able to change the template)
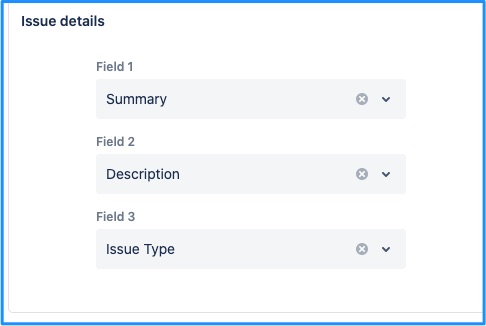
Field 1 - For the sake of easiness, choose summary.
Field 2 - Choose description from the dropdown.
Field 3 - Pick up issue type from the selector.
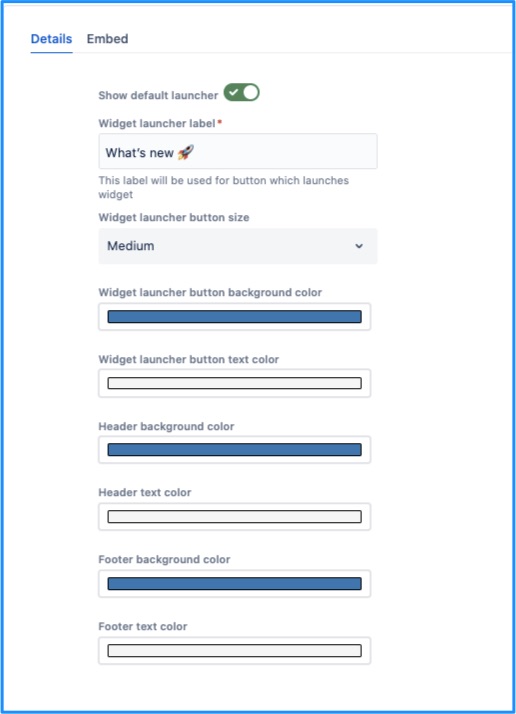
Step 3 - Choose look & feel related configurations. You can pretty much use the default one to get started. (Note that the embed tab will be available after initial save)
Step 4 - Widget content - This is the JQL similar to what you use within ARN templates' JQL section. Just use the default one for now.

Step 5 - Click on save, let the page reload. Now click on the ‘Embed’ tab. This is how it will look like.
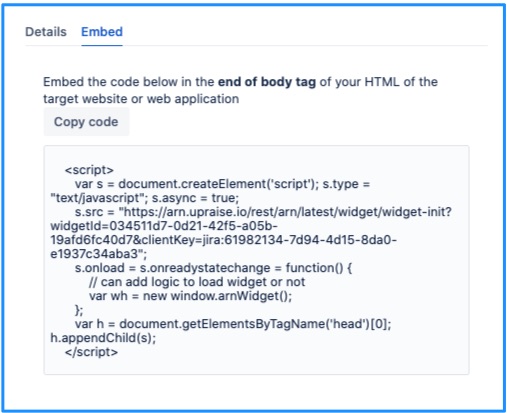
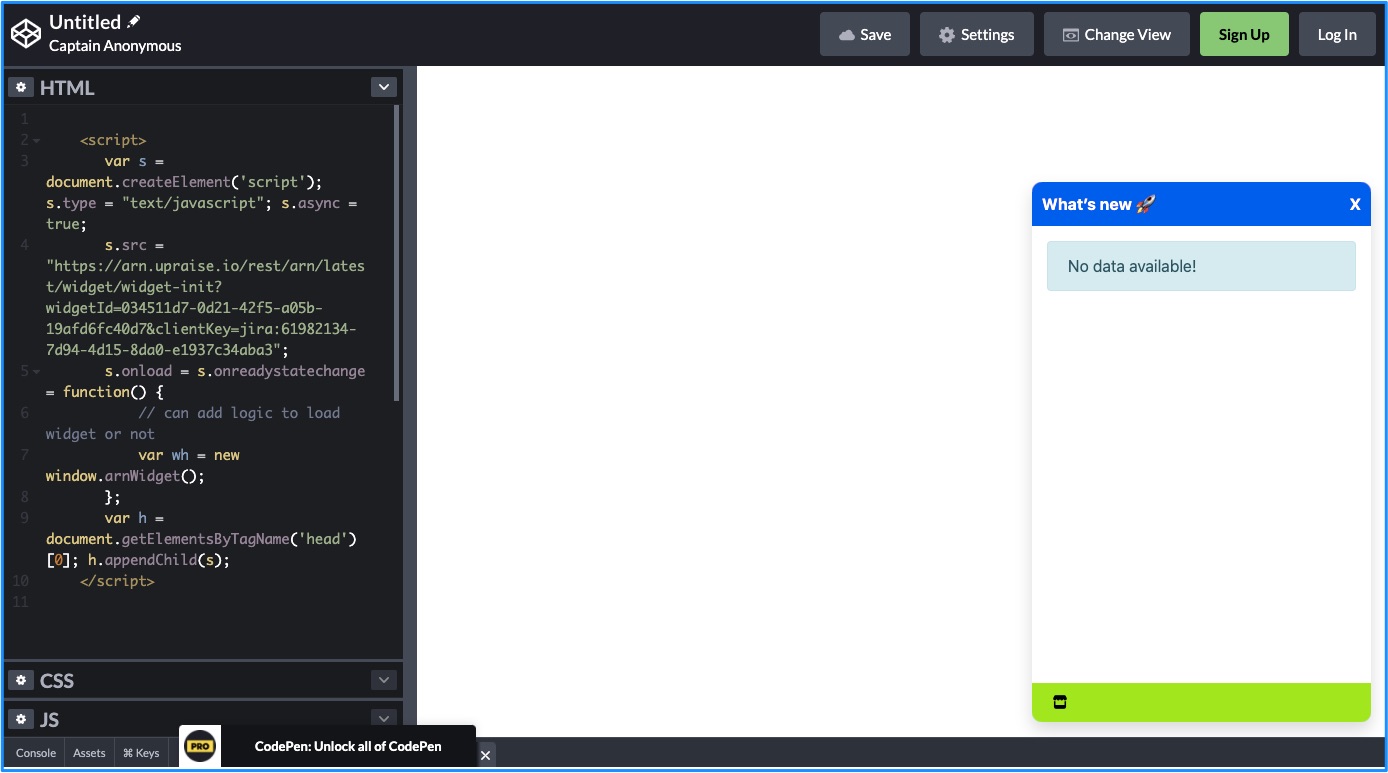
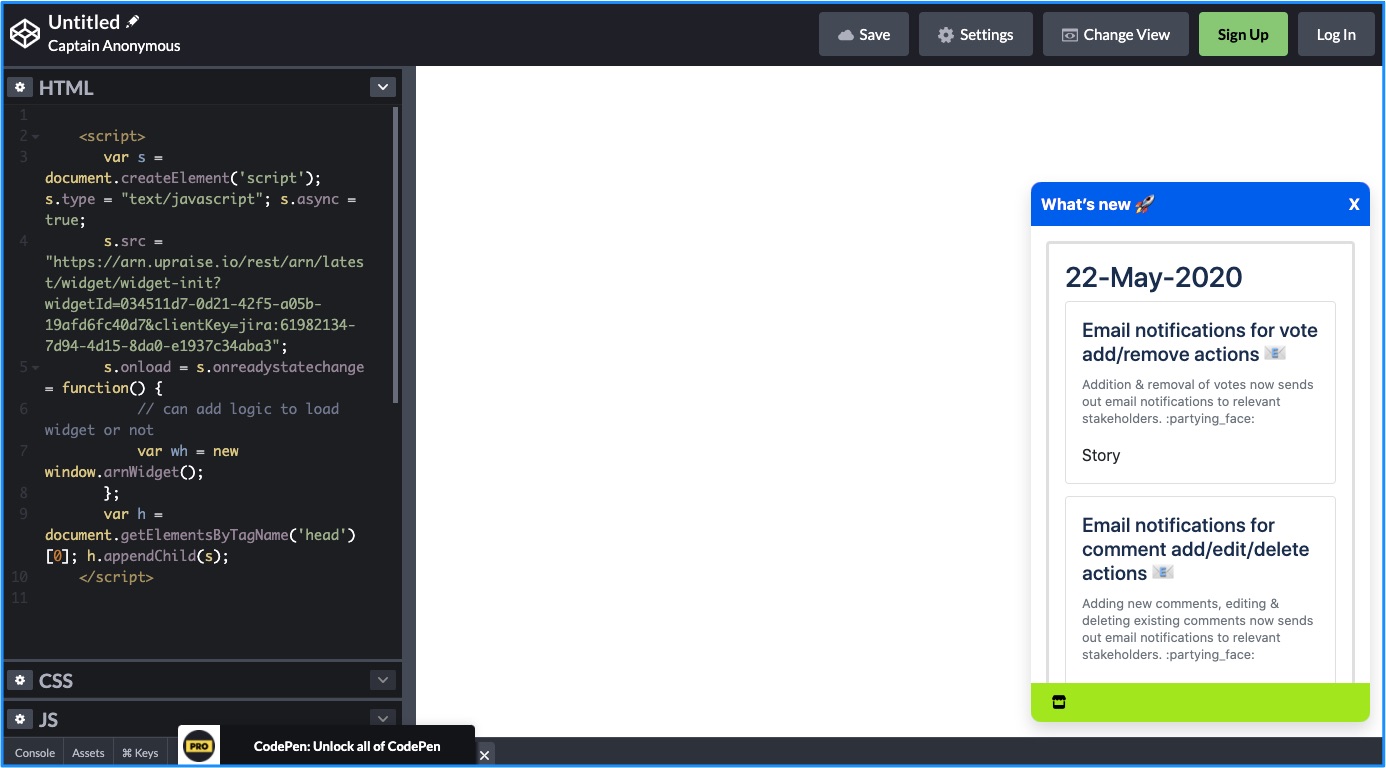
Step 6 - To test whether the embed code works, copy the code. And then head over to https://codepen.io/pen/. In there, paste the copied code into HTML section. In a few seconds, the widget should appear in the preview section. Although it appears, it doesn’t have any release related data yet.
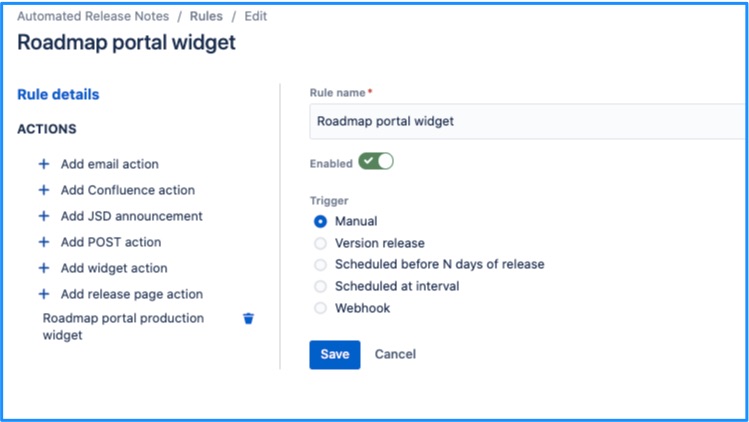
Step 7 - Now create a manual rule & insert widget action inside of it. This is how it should look like.
Step 8 - Now run the manual rule by providing to it the relevant version name.
Step 9 - After running the rule, wait for about 30 seconds & go back to the codepen tab. Refresh the page, paste the code again into the HTML area. Release notes will now be available within the widget.
On this page | ||||||||
|---|---|---|---|---|---|---|---|---|
|
| Iframe | ||||||||||||
|---|---|---|---|---|---|---|---|---|---|---|---|---|
|