Customising Template - Old Approach
This approach to email template customisation will continue to work, although we strongly recommend making use of the new approach discussed here.
Note
Following customisation approach works well for cloud as well as server version.
Automated Release Notes add-on comes with a template builder. When navigating to 'Release Notes' for any project - user will see this template tab if there is no default template stored. Once a default template is stored for that project, from the next time on user will be brought to the email tab first.
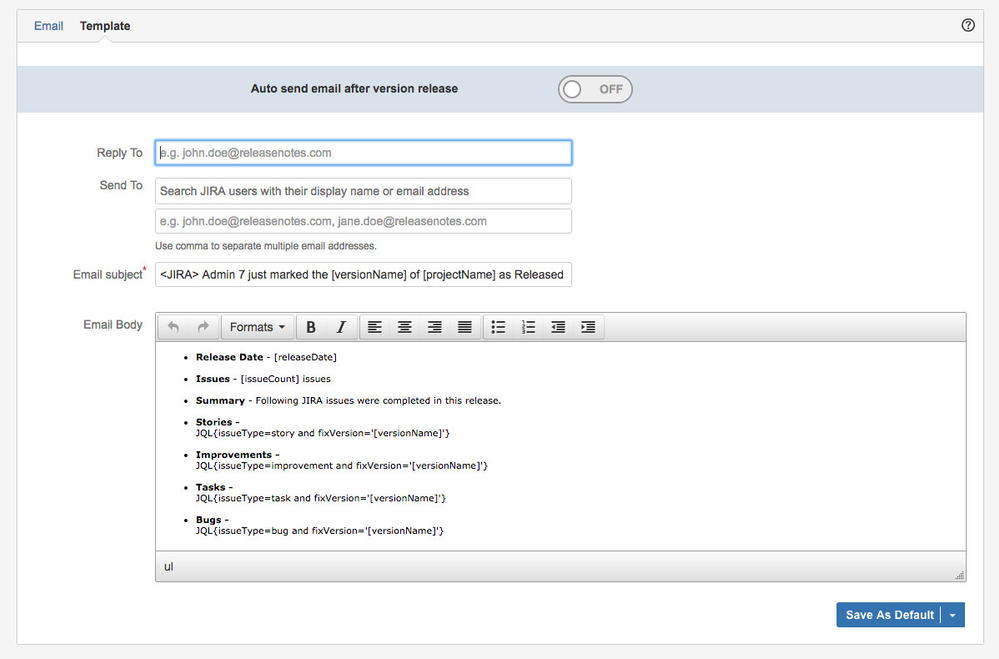
This is how the Template tab looks like on first navigation -
How it works?
The screen loads with a default Email body template. All the parameters on this screen can be stored as 'Default template'. This data then will be used to generate and send release notes when a version is released in JIRA, if the 'Auto send email after version release' is on.
For sending one-odd email, make changes to the template and from the split button at the bottom - click 'Use once'. You will be brought to the email screen with all the variables and queries converted into actual data that will be sent within the email body. More about using the email tab to send emails.
Parameter Details:
Reply to: This parameter is used to set the reply-to email address in the 'Release notes' email. So when the recipient of the Release notes email clicks on reply action, this email address will be populated. This parameter expects only one email address in valid format.
Send to: Emails can be sent to JIRA as well as non-JIRA users & all users within selected JIRA user groups.
First text box allows you to search & add multiple JIRA users. You can search by their display name or email address.
Second text box accepts multiple email addresses separated by comma.
Third box lets you choose JIRA user groups. Do note that the emails will be sent to all the users within these groups.
Email subject: By default, the email subject is set to <JIRA> [userName] just marked the [versionName] of [projectName] as Released
Strings within the square brackets are variables which are replaced while generating the email.
Important
Note that the variables are case sensitive & we recommend you to use them as prescribed here.
[userName] - is replaced by the user's display name, who generates the email or marks a version as released when auto-send is turned on.
[versionName] - is replaced by the version name, where the user has navigated to or the one that is released when auto-send is turned on.
[projectName] - is replaced by the project name of the corresponding version.
[releaseDate] - is replaced by the release date from corresponding version, in the date format that is default set in JIRA settings.
[userEmail] - is replaced by the user's email address, who generates the email or marks a version as released when auto-send is turned on.
Email body: This is the actual email template which helps retrieve relevant data from JIRA. Default template that is shipped with the add-on tabulates items assuming default JIRA issue types - Stories, Improvements, Tasks & Bugs. When unspecified, following columns are included by default - Priority, Key, Summary, Status. You can use JQL queries to fetch the required JIRA issues and then decide which columns you want included in the release notes email. Read on to learn how!!
Important
Release notes email template can be fully customised to display or omit certain issues based on their attributes. You can make use of not only the default issue attributes but also the custom fields that you might have added to your JIRA project.
This is how you can customise the columns that are displayed - Notice below how different issue attributes are listed after <COLUMNS> separated by comma. Each attribute is checked if it exists as a default issue attribute, if it is supported (list of supported attributes in the next info box) its value is retrieved. If it doesn't exist as default issue attribute, the add-on checks if it is a custom field name - if yes, retrieves value else adds an empty column where you can manually add your comment.
JQL{issueType=improvement and fixVersion='[versionName]'<COLUMNS>priority, type, status, key, id, assignee, creator, reporter, summary, votes}e.g. Say if you want to have Priority, Type, Key, Summary & Creator columns from default attributes. Guidance - a custom field, hypothetical & then an empty column to add your comments. This is how the query would look like.
JQL{fixVersion='[versionName]'<COLUMNS>priority, type, key, summary, creator, guidance, comment}- This is how you can use JQL queries - At the moment, there is no validation within the Automated Release Notes add-on for any JQL that is written in the Template → Email Body. One way to ensure that your queries are not breaking is to cross check the same JQL query in JIRA issues advanced search. If the JQL works fine in JIRA, it will work well in the add-on as well. Everything after the JQL{ until before <COLUMNS> is part of the JQL. Only change you have to do while cross checking is to replace [versionName] with the actual version name.
e.g. in the first code block above, you can verify the JQL by "issueType=improvement and fixVersion=3.5" trying this in the advanced issue search box. Give the version name is 3.5 - Tabular or Sequential formatting of the issues - There are two possibilities when it comes to layout/formatting of the email body. By default, if you don't specify any format system treats it as a Tabular layout. If you want to change the format to sequential just add <FORMAT>SEQUENTIAL before the closing brace.
Important
Which default JIRA issue attributes are supported?
- priority
- type
- status
- key
- id
- assignee
- creator
- reporter
- summary
- votes
- watchers
- fixversions
- labels
- sprint
- linkedIssue
- component
If you'd like to see issues from different projects in release notes, read this.
If you need any help in customizing your release notes template or want to post your suggestions, feature requests, bugs, please reach out to us via our service desk here.